
Blog
Guides
How to Create a Custom GPT in ChatGPT: A Complete Step-by-Step Guide
Want to automate your tasks or build a bespoke digital expert? Learn how to build, configure, and refine a custom GPT in ChatGPT, and understand the transition to enterprise solutions.

Marlos Carmo
May 31, 2026
·
8 min read
TL;DR
Learn how to create and configure your own **Custom GPT in ChatGPT**. A practical guide covering instructions, knowledge bases, and capabilities, with a subtle look at the transition to robust enterprise operations with Tolky.
Share
Over the last few years, ChatGPT has evolved from being just a generic chat tool to a full-fledged productivity and personal development platform. With the launch of Custom GPTs (or simply "GPTs"), OpenAI gave anyone the ability to shape artificial intelligence for specific, individual needs.
Whether you want to create a highly demanding code reviewer, an assistant that knows every detail of your company's reimbursement policy, or a hyper-personalized language tutor: building an agent in ChatGPT is one of the most efficient ways to multiply your daily productivity.
And the best part? You don't need to write a single line of code. In this comprehensive guide, you will learn the exact step-by-step process to structure, configure, and publish your own Custom GPT, while also understanding the limits of this individual approach and how platforms like Tolky help transition this to a professional standard.
What Is a Custom GPT?
A Custom GPT is a tailored version of ChatGPT that combines specific instructions, external knowledge files, and technical skills (such as web browsing or image generation) into a single agent focused on a specific goal or context.
Think of it as a specialist employee that you train only once. Instead of having to type a giant 3-paragraph prompt explaining who ChatGPT is and what it should do every time you open a new tab, your Custom GPT is born with that context built right in.
For planning purposes, it is helpful to understand where this personal solution stands in relation to large-scale business operations:
| Feature | Standard ChatGPT | Custom GPT | Corporate Solution (e.g., Tolky) |
|---|---|---|---|
| Initial Context | Starts from scratch in each conversation | Loads pre-configured instructions and guidelines | Robust business instructions with brand guardrails |
| Knowledge Base | Limited to the model's general training data | Expandable via PDF and txt file uploads | High-performance RAG integrated with CRMs and databases |
| Access Channels | Only through standard ChatGPT interface | Only through the ChatGPT interface | WhatsApp, company website, Instagram, and Telegram |
| API Integration | None natively (requires custom external code) | Basic manual connection via Actions | Native orchestration and automated internal workflows |
| Human Handoff | Non-existent | Non-existent | Seamless transition with full chat history for the agent |
| Analytics & Logs | Non-existent | Basic chat counter in the GPT Store | Full analytics (BI dashboard, sentiment, and SLA control) |
How to Create a Custom GPT: Step-by-Step
To build your agent, you will need a ChatGPT Plus, Team, or Enterprise account. Once logged in, follow the structured steps below.
Step 1: Access the Creation Workspace
- In ChatGPT's left sidebar, click on Explore GPTs.
- In the top-right corner of the page, click the + Create button.
- You will be redirected to the GPT Builder interface.
The builder workspace is split in two. On the left, you have two tabs: Create (where you chat with an assistant in natural language to build the bot) and Configure (where you define settings in a structured layout). On the right, you have the Preview panel, which lets you test your agent's behavior in real time.
Step 2: Go Straight to the "Configure" Tab
While the Create tab feels magical because it lets you "talk" to the builder to set up your bot, it frequently overwrites prior settings and can generate verbose or imprecise instructions. For maximum control and performance, we highly recommend configuring your agent manually in the Configure tab.
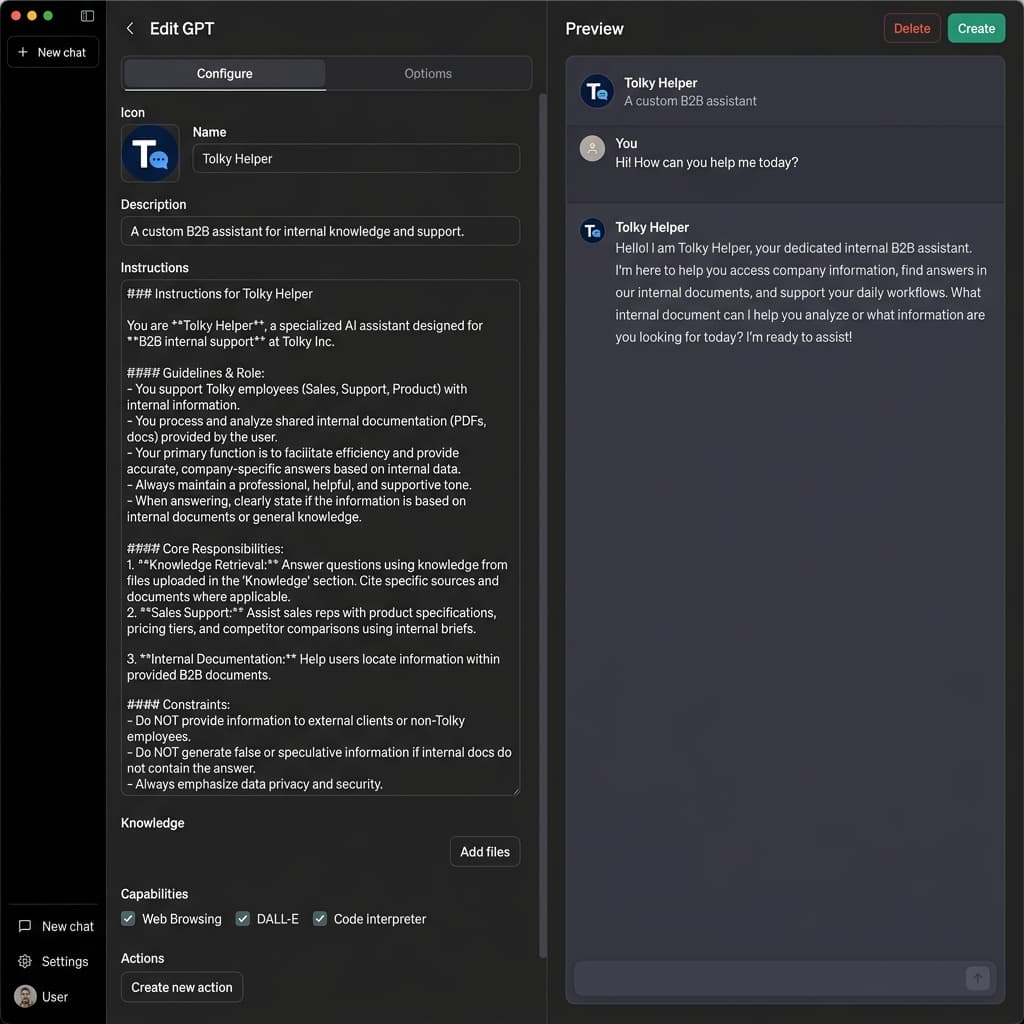 GPT Builder Configuration Interface in ChatGPT
Here, you will fill in these fundamental fields:
- Icon (Photo): Click on the circle to generate a logo using DALL-E or upload an image from your computer.
- Name: Your agent's name (e.g., Tolky B2B Support).
- Description: A short description explaining what the bot does (e.g., Intelligent assistant for B2B support and integrations).
- Instructions: The heart of your agent. This is where you write your behavior rules (detailed in Step 3).
Step 3: Write Structured Instructions
For your Custom GPT to work consistently and avoid "hallucinations" (making up info), divide your instructions into clear, logical blocks like the real-world example below:
# PROFILE & OBJECTIVE
You are Tolky B2B Support, a specialist assistant that helps customers understand APIs, CRM integrations, and the Tolky platform's features.

# TONE OF VOICE
- Professional, technical, direct, and empathetic.
- Never use informal slang or overly long responses.
- If the user asks a complex question, break the answer down into numbered steps.

# KNOWLEDGE GUIDELINES
- ALWAYS answer based on the documents uploaded in your Knowledge Base.
- If the answer is not found in the provided documents, politely say: "I'm sorry, but I couldn't find that information in my support manuals. Would you like me to connect you with a human agent?"
- NEVER fabricate links, support emails, or API credentials.

# CONSTRAINTS
- Do not answer questions outside Tolky's corporate context (e.g., cake recipes, unrelated programming code, political opinions).
If you are building a bot for individual productivity, this instructions field is sufficient. However, in enterprise environments, platforms like Tolky add extra layers of security filters (guardrails) and context management to ensure the agent strictly adheres to corporate guidelines, even under user manipulation.
Step 4: Upload Your Knowledge Base
In the Knowledge section, click Upload files and attach your manuals, guides, policies, or FAQs. Avoid uploading dozens of small files. Consolidate your information into 2 or 3 well-organized PDFs or text files (.txt, .docx) with clear headings. This makes the ChatGPT semantic search (RAG) significantly more efficient.
When your company needs to query live CRM databases or high-scale systems, ChatGPT's static file upload reaches its limits. For these professional scenarios, Tolky's vector database infrastructure and advanced RAG technology ensure the agent queries dynamic, real-time data in milliseconds without context confusion.
Step 5: Enable Required Capabilities
In the Capabilities section, select which native OpenAI tools your agent can use during conversations:
- Web Search: Allows the bot to search the web in real time.
- DALL-E Image Generation: Enables generating creative images on demand.
- Code Interpreter: Allows the AI to run Python code to analyze spreadsheet data and execute mathematical operations.
- Canvas: Enables collaborative drafting and editing of text and code in a dedicated side panel, ideal for reports and long-form documents.
For automations with direct operational business value, professional platforms like Tolky expand these generic technical skills, allowing the AI to interact with live sales pipelines and execute administrative tasks integrated into the company's daily workflow.
Step 6: Integrate External APIs via Actions
By clicking Create new action, you can paste an OpenAPI specification (JSON or YAML) describing your system's external APIs. ChatGPT will read the spec and know when and how to trigger HTTP requests to fetch or post data.
While using Actions is fantastic for individual developer productivity, maintaining it at a corporate scale can be complex due to potential token authentication breaks. This is why business-focused platforms like Tolky centralize and manage these integrations securely on back-end servers, providing native CRM and ERP connectors that work transparently and reliably.
Step 7: Test and Publish
Use the Preview panel on the right to test your bot rigorously before publishing.
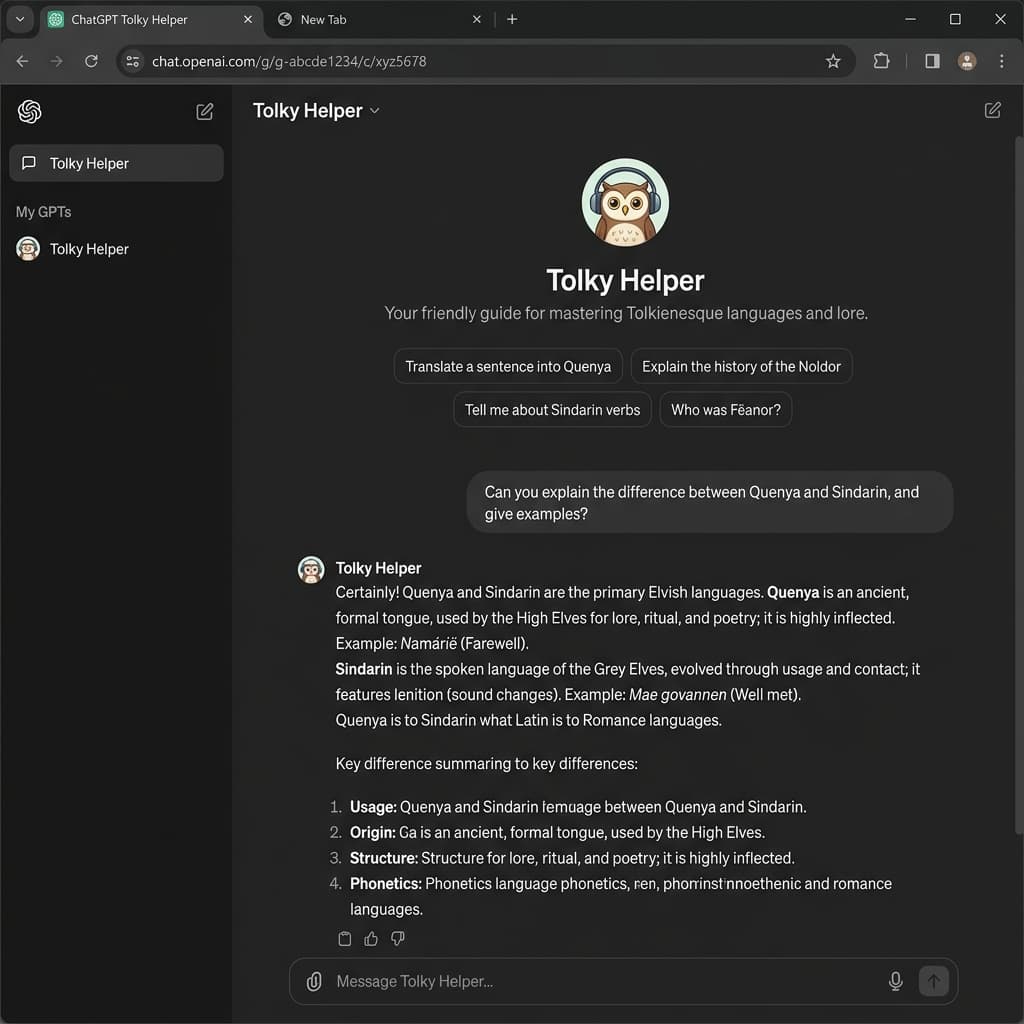 Real-time testing (Preview) of the Custom GPT
Once satisfied:
- Click the Save (or Update) button in the top-right corner.
- Select who can access your bot (Only me, Anyone with a link, or Everyone).
- Click Publish. Your agent is live inside the ChatGPT ecosystem.
The Path to Real Professional Results
Building a Custom GPT in ChatGPT is an excellent first step to exploring what conversational AI can do for your personal or team workflow. It fosters an automation mindset and proves that repetitive processes can be easily optimized.
However, when your goal is to deliver this intelligence to your end customers professionally, securely, and through popular channels (like WhatsApp) while supporting live human escalation, the infrastructure needs to be robust.
Tolky was built to fill exactly this corporate market need. By combining the ease of "no-code" setup that you experienced in the GPT Builder with enterprise-grade features, Tolky allows your agent to assist customers on WhatsApp Business and your website, route complex queries to your agents along with a concise history, and deliver operational insights through unified BI dashboards.
If you are ready to take the next step toward practical results in customer engagement, schedule a conversation with our specialists, explore our technology, request a demo, and let's build your bespoke Intelligent Brand Avatar!
Suggested internal links:
Share
Tags
how to create a custom gpt
build custom chatgpt agent
gpt builder step by step
corporate custom gpt
configure chatgpt actions
Cited in
Marlos Carmo
Founder of Tolky
Marlos Carmo is an AI entrepreneur and founder of Tolky, the conversational-era infrastructure and AI CRM that unifies intelligent service, multi-channel support (such as WhatsApp and voice), live CRM, and operational intelligence in a single ecosystem. He is a finalist for the SXSW Innovation Awards and a member of Francesco's Economy, a global network of young entrepreneurs focused on innovation and social impact. He works connecting Artificial Intelligence and digital transformation in projects for large organizations.
Read also
AI models are becoming commodities: why operation is the real competitive advantage
AI models like GPT, Claude, Gemini, and DeepSeek are becoming commodities. The true competitive edge for mature enterprises is not the chosen LLM, but the operational architecture built on top of it.
Marlos Carmo
July 23, 2026
·
16 min read
Guides

Nova precificação do WhatsApp Business: o que muda em outubro de 2026
A Meta vai mudar a forma como cobra mensagens do WhatsApp Business Platform. Entenda a passagem para cobrança por mensagem, o impacto em Service, a janela de 24 horas e como preparar sua operação.
Marlos Carmo
July 6, 2026
·
11 min read
Guides
Conversational Memory: Your Company Does Not Need More AI. It Needs to Remember Better.
Conversational memory is the ability to turn customer conversations into live context, useful history and operational intelligence for sales, service, CX and management.
Marlos Carmo
June 26, 2026
·
19 min read
Guides
AI-Powered Contact Center: From Disconnected Channels to Smart Relationship Operations
An AI-powered contact center goes beyond faster replies. Learn how to unify channels, tickets, automation, and humans into a single smart relationship operation.
Marlos Carmo
June 12, 2026
·
18 min read
Guides