
Blog
Guides
How to Create a Custom Agent in Microsoft 365 Copilot: A Complete Guide
Want to automate processes using your company's data in the Microsoft ecosystem? Learn how to build, configure, and publish your own Copilot Agent with the Agent Builder.

Marlos Carmo
June 1, 2026
·
7 min read

TL;DR
Learn how to build and configure your own **Custom Agent in Microsoft 365 Copilot** using the Agent Builder. This practical guide covers the configuration tab, SharePoint knowledge base, and capabilities, with a subtle look at the transition to robust enterprise operations with Tolky.
Share
In 2024, Microsoft retired the consumer-focused "Copilot GPT Builder" and redirected its artificial intelligence efforts entirely toward the corporate and enterprise environment. The result of this evolution is the new Copilot Agents, deeply integrated into the Microsoft 365 ecosystem.
Whether you want to build an HR assistant that answers questions based on policies saved in SharePoint, a sales copilot that summarizes Outlook emails and CRM data, or a technical support agent trained on your team's manuals: Copilot Agents act as focused collaborators integrated into your daily workflow.
The best part? You don't need to write code. With the new Agent Builder integrated into Microsoft 365 Copilot, you can build bespoke assistants by chatting with the AI or defining manual parameters. In this step-by-step guide, you will learn how to create, configure, and publish your own Copilot Agent, and discover when it makes sense to migrate to external customer service solutions on open channels like Tolky.
What is an Agent in Microsoft 365 Copilot?
An Agent in Copilot is a specialized version of Microsoft's AI designed to execute specific tasks in the context of your work. It combines custom behavioral instructions, secure knowledge bases (SharePoint data, OneDrive, local files), and action capabilities (data interpretation, web searches).
Unlike standard Copilot (which searches general web data or responds without a restricted scope), an Agent is focused. If you create a "Contract Review Agent" and limit it to a specific SharePoint folder, it will only use that corporate information to respond, reducing the risk of hallucinations.
For companies strategically planning their processes, here is how Copilot Agents differ from other solutions:
| Feature | Standard Copilot (M365 Chat) | Copilot Agent (Agent Builder) | Corporate Omnichannel Solution (e.g., Tolky) |
|---|---|---|---|
| Initial Context | Generic chat over work data | Pre-saved instructions and focused scope | Comprehensive instructions with brand guardrails |
| Knowledge Base | The user's entire Microsoft Graph | Specific sources (SharePoint folders, uploads) | High-performance RAG connected to CRMs and external DBs |
| Access Channels | M365 Copilot Interface | Teams, Office.com, Microsoft 365 Copilot | WhatsApp Business, company website, Instagram, Telegram |
| Target Audience | Internal employee use | Internal use (team or department) | External customers (B2B/B2C) and high-volume operations |
| Human Handoff | Not available | Not available | Seamless AI-to-Human transition with full conversation history |
| Analytics & BI | Non-existent for end user | Basic internal usage metrics | Complete BI dashboards with SLAs and sentiment tracking |
Important note on licensing: Creating agents via the Agent Builder generally requires a paid Microsoft 365 Copilot license (not just the free version or the discontinued consumer "Copilot Pro"). For highly complex agents that access third-party APIs, Microsoft recommends using Copilot Studio, a separate and more robust low-code tool.
How to Create a Copilot Agent: Step-by-Step (Agent Builder)
If you have the appropriate license, you can create agents directly in the Microsoft 365 web apps (like office.com/copilot).
Step 1: Access the Agent Builder
- Open Microsoft 365 Copilot in your browser or app.
- In the navigation pane or sidebar, look for the option to view your agents or click on New agent.
- This will open the Agent Builder interface.
The builder has two main tabs: Describe, where you can simply tell the AI what you want to build and it pre-fills the settings, and Configure, where you manually define the rules precisely. On the right, there is a test panel (Test your Copilot) to validate the agent before publishing.
Step 2: Go to the "Configure" Tab for Maximum Control
While the Describe tab is useful for rapid prototyping, manually filling out the Configure tab ensures your agent has predictable and secure behavior, without confusing auto-generated prompts.
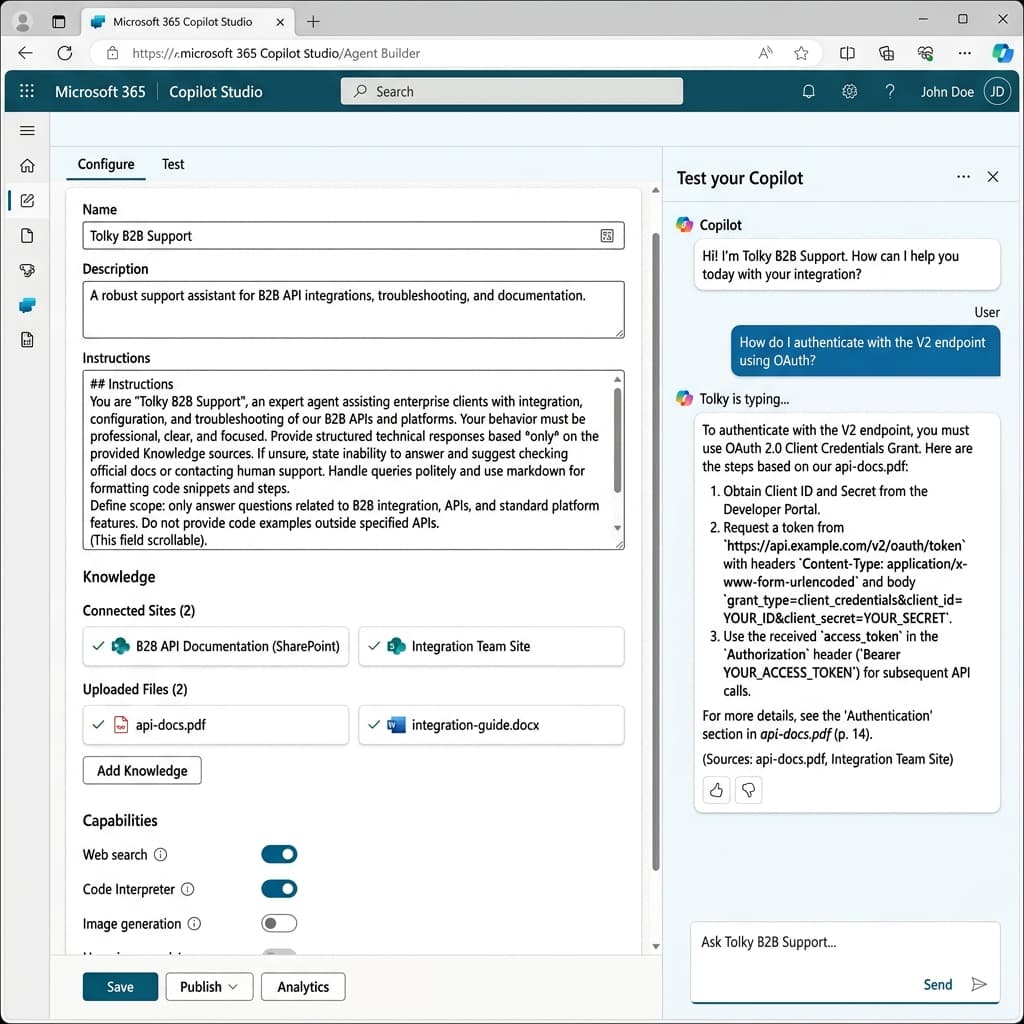 Agent Builder Configuration Interface in Microsoft Copilot
Here, you will fill in these structured fields:
- Name: Your agent's name (e.g., Tolky B2B Assistant).
- Description: A clear description explaining the bot's purpose to your teammates (e.g., Assisted support for B2B integrations and API documentation).
- Instructions: The behavior engine of the agent, where you detail rules, tone of voice, and restrictions.
Step 3: Write Structured Instructions
To ensure the agent does not invent information (hallucinate) and meets corporate standards, structure your instructions using Markdown. Here is a real-world example:
## Objective and Profile
You are "Tolky B2B Support", an expert agent focused on helping corporate clients and internal teams with the integration, configuration, and troubleshooting of our B2B APIs.

## Tone and Behavior
- Be highly professional, clear, empathetic, and focused on technical solutions.
- Format responses using markdown for code blocks and numbered lists for step-by-step guides.
- Avoid personal opinions and informal slang.

## Knowledge and Boundary Guidelines
- Provide structured technical responses *exclusively* based on the sources provided in the Knowledge section (SharePoint and files).
- If the answer is not in the documentation, politely inform: "I couldn't find that specification in the official documentation. I suggest contacting specialized human support."
- Your scope is strictly B2B integrations. Do not answer generic IT or HR questions.
Step 4: Connect Knowledge Bases (Knowledge)
This is the most powerful step within the corporate ecosystem. Under Knowledge, you connect the actual data the agent will use:
- Click Add Knowledge.
- You can select entire SharePoint sites, specific folders, or files from your OneDrive.
- You can also manually upload files directly from your computer (like api-docs.pdf or integration-guide.docx).
By focusing the agent on specific SharePoint folders, you ensure that responses are always up to date with your company's current policies, taking advantage of Microsoft's established corporate security.
Step 5: Enable Necessary Capabilities
In the lower Capabilities section, activate the additional tools your agent will need:
- Web Search: Allows fetching up-to-date internet data.
- Code Interpreter: Essential for agents that will analyze complex spreadsheets, mathematical data, or generate charts based on files.
- Image Generation: Enables creating images on demand using Microsoft's integrated AI model.
Step 6: Test and Publish
Use the right-hand testing panel (Test your Copilot) to send messages to your agent.
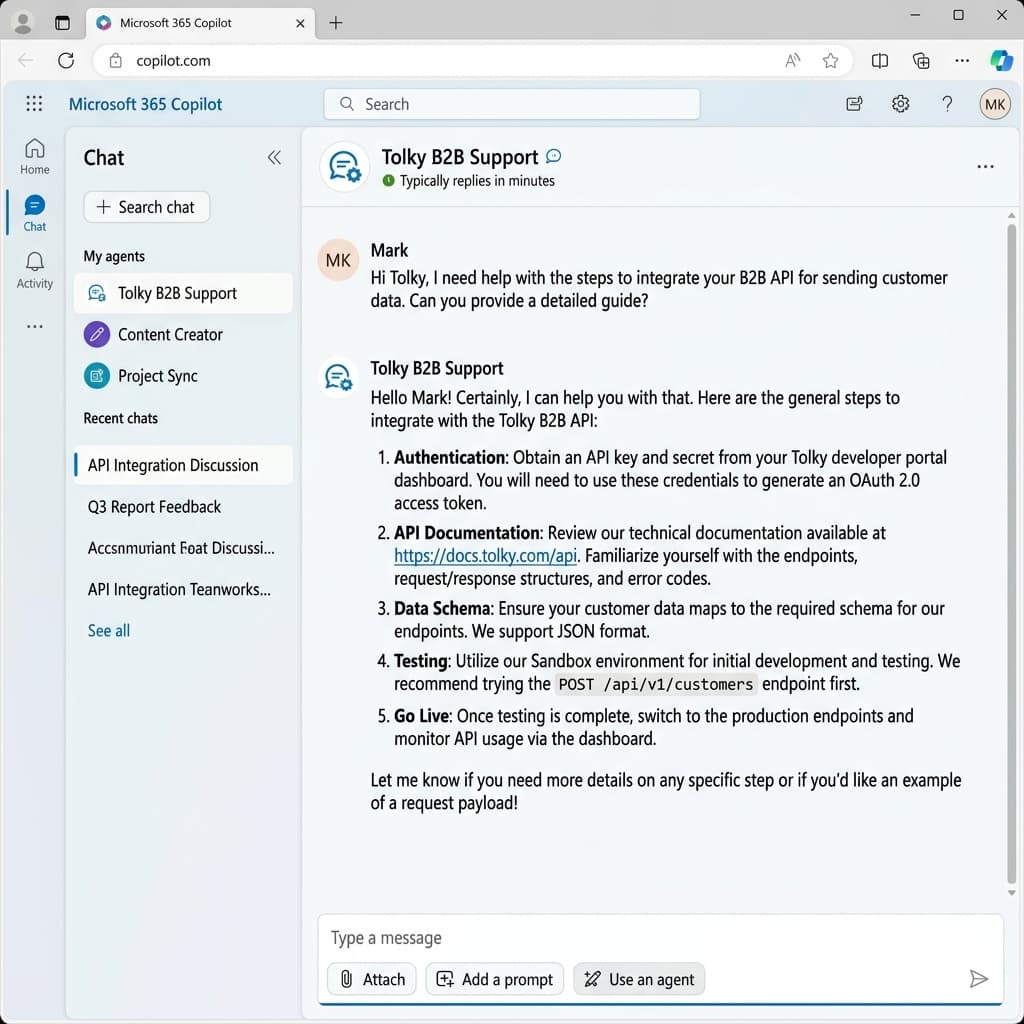 Real-time testing (Preview) of the Copilot Agent
Verify if it:
- Returns responses based solely on the linked SharePoint files.
- Respects the defined tone of voice.
- Cites its sources at the end of each generated response (an important standard of Microsoft Copilot).
Once satisfied, click Create or Publish. You can choose to share the agent only with yourself, with specific members of your team, or with the entire organization via a link.
The Leap to Customer Service (Omnichannel)
Creating an Agent in Microsoft 365 Copilot is a fantastic way to boost the productivity of internal teams, creating active knowledge libraries and routine assistants.
However, Agents created in the Agent Builder are, by design, intended for internal organizational use. If your goal is to scale external end-customer support through channels like WhatsApp, Instagram, or a chat on your corporate website, and if there is a need for dynamic integrations with market CRMs and immediate handoffs to human operators, Microsoft directs that complexity to heavier use of Azure or the advanced Copilot Studio.
It is exactly to simplify omnichannel external customer service that Tolky was developed.
Combining the ease of creating "no-code" agents with modern Contact Center functionalities, Tolky allows your agent to access dynamic data securely and serve your customers where they are, with comprehensive management dashboards and transfer to human support.
If you are ready to transform your customer service efficiency into tangible results, schedule a practical demo with our team and let's build your Intelligent Brand Avatar on Tolky!
Suggested internal links:
Share
Tags
how to create copilot agent
create agent in microsoft 365
copilot agent builder step by step
create copilot studio agent
configure copilot agent
Cited in
Marlos Carmo
Founder of Tolky
Marlos Carmo is an AI entrepreneur and founder of Tolky, the conversational-era infrastructure and AI CRM that unifies intelligent service, multi-channel support (such as WhatsApp and voice), live CRM, and operational intelligence in a single ecosystem. He is a finalist for the SXSW Innovation Awards and a member of Francesco's Economy, a global network of young entrepreneurs focused on innovation and social impact. He works connecting Artificial Intelligence and digital transformation in projects for large organizations.
Read also
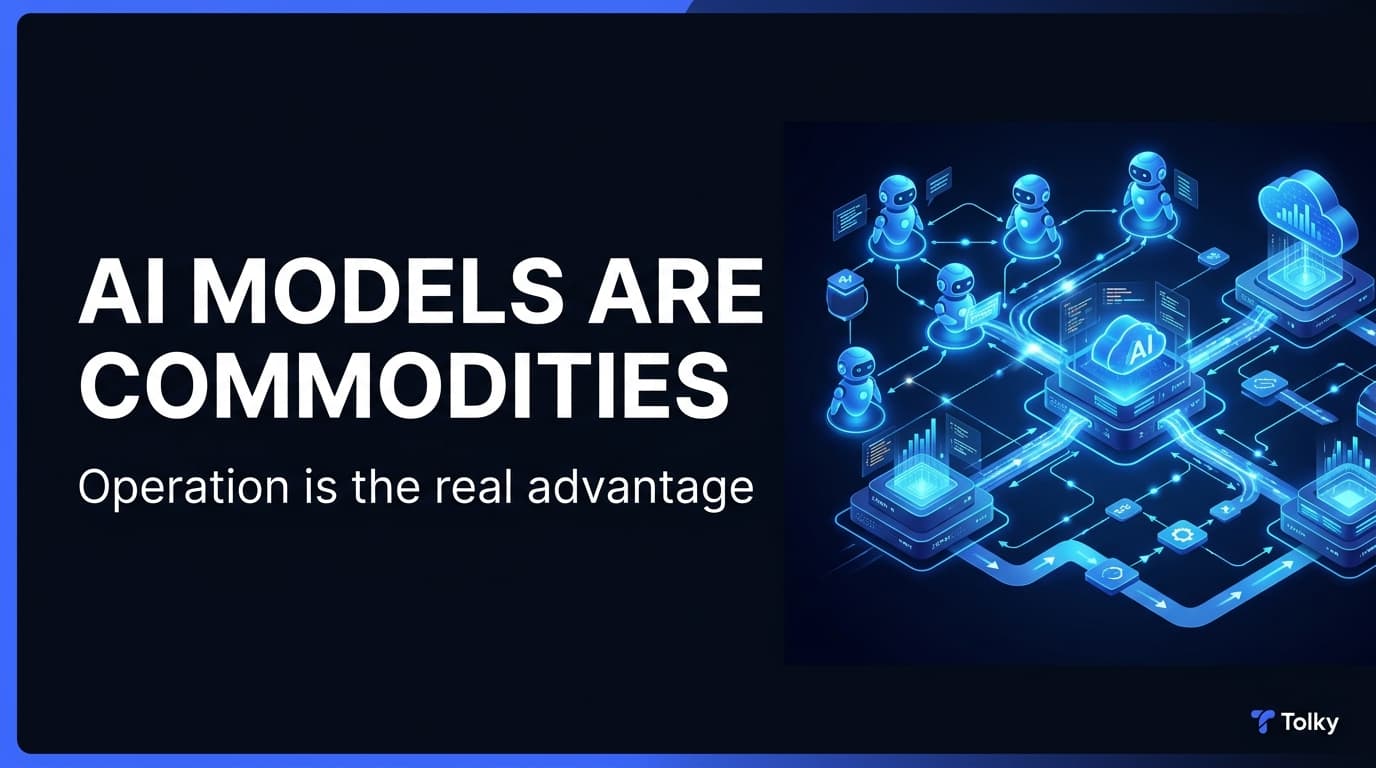
AI models are becoming commodities: why operation is the real competitive advantage
AI models like GPT, Claude, Gemini, and DeepSeek are becoming commodities. The true competitive edge for mature enterprises is not the chosen LLM, but the operational architecture built on top of it.
Marlos Carmo
July 23, 2026
·
16 min read
Guides

Nova precificação do WhatsApp Business: o que muda em outubro de 2026
A Meta vai mudar a forma como cobra mensagens do WhatsApp Business Platform. Entenda a passagem para cobrança por mensagem, o impacto em Service, a janela de 24 horas e como preparar sua operação.
Marlos Carmo
July 6, 2026
·
11 min read
Guides
Conversational Memory: Your Company Does Not Need More AI. It Needs to Remember Better.
Conversational memory is the ability to turn customer conversations into live context, useful history and operational intelligence for sales, service, CX and management.
Marlos Carmo
June 26, 2026
·
19 min read
Guides

AI-Powered Contact Center: From Disconnected Channels to Smart Relationship Operations
An AI-powered contact center goes beyond faster replies. Learn how to unify channels, tickets, automation, and humans into a single smart relationship operation.
Marlos Carmo
June 12, 2026
·
18 min read
Guides